We get it — after a big day out on the trails, all you want to do is kick off your shoes and grab a brew. But before you roll your bike into the shed, take ten minutes to give it a proper clean.
A bit of post-ride care makes a massive difference to how your bike performs — and how long it lasts.
Here’s our simple, tried-and-tested guide to cleaning your mountain bike properly (and why it’s worth the effort).
 What You’ll Need
Cleaning gear:
- A bucket of warm water or a low-pressure hose
- Bike-specific cleaner or degreaser (avoid household washing-up liquid — it can strip grease from bearings)
- Two or three brushes (soft and stiff bristles)
- A sponge or microfibre cloth
- Chain cleaning tool (optional but useful)
Lubrication:
- Chain lube (wet or dry, depending on conditions)
- A small rag for wiping the chain
Optional (but recommended):
- A bike stand (to get the wheels off the ground)
- A drivetrain cleaning brush
- Bike polish or silicone spray for the frame
 Step-by-Step: How to Clean Your Mountain Bike
- Rinse off the worst of the dirtStart with a gentle hose or a bucket of clean water to remove the heavy mud.
 Tip: Avoid pressure washers — they can force water into bearings, ruining hubs, bottom brackets, and suspension seals.
 - Apply bike cleaner or degreaser
Spray a bike-specific cleaner over the frame, wheels, and components. Let it sit for a minute or two — don’t rush it. If your drivetrain (chain, cassette, chainrings, derailleurs) is really mucky, apply a degreaser directly to those parts. - Scrub the drivetrain
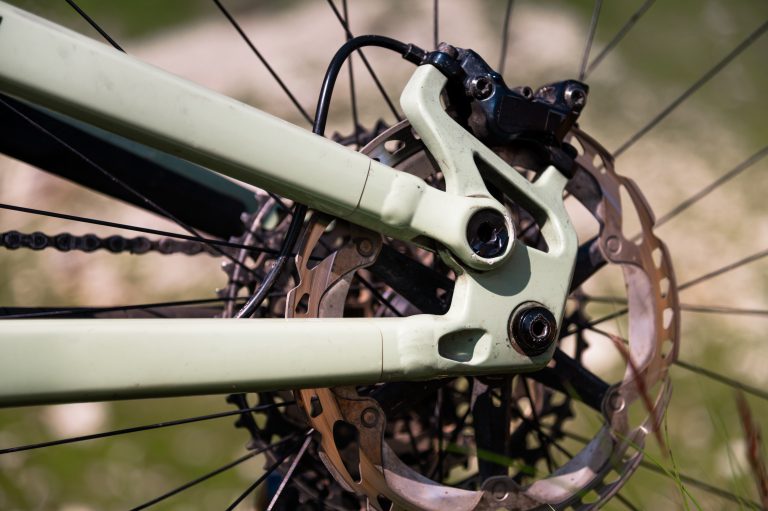
Use a stiff brush or a dedicated chain-cleaning tool. Get between the cassette cogs, under the jockey wheels, and around the chainrings. This is where grit and old oil hide — the stuff that can grind away at your components if left untreated. - Clean the frame and wheels
Use a soft brush or sponge for the frame, forks, and wheels. Work from top to bottom, finishing with the dirtiest bits last (usually the underside of the frame and rear triangle). - Rinse again
Give the bike another light rinse to wash off any cleaner and grime. Again — gentle is key! - Dry thoroughly
Use a clean cloth or towel to dry the bike. Pay attention to areas around the suspension pivots, headset, and bottom bracket. If you have compressed air or a leaf blower, that works too (just avoid blasting water deeper into seals). - Lube the chainOnce dry, apply a drop of chain lube to each link. Wipe off any excess with a clean rag.
-
- Use wet lube in wet or muddy conditions.
-
- Use dry lube in dry, dusty conditions.
This step is crucial — a well-lubed chain means smoother shifting, less wear, and a quieter ride.
-
- (Optional) Polish the frame
A quick mist of bike polish or silicone spray on the frame helps repel dirt and water next time. Avoid getting it on braking surfaces!
 Why You Shouldn’t Put Your Bike Away Dirty
It might seem harmless, but putting a dirty bike straight into storage causes long-term damage:
- Mud holds moisture, which leads to corrosion on bolts, chain, and gears.
- Grit acts like sandpaper, grinding away at moving parts and shortening their lifespan.
- Suspension seals and bearings suffer, leading to expensive repairs later on.
- Caked-on dirt hides problems — cracks, cable frays, or seal leaks you’d otherwise spot early.
In short: a clean bike is a happy bike 
 A few minutes now saves hours (and pounds) later.
 Need Supplies or Advice?
Pop into 3 Peaks Cycles in Settle — we’ve got all the cleaning products, brushes, and lubes you’ll need. And if your bike’s due a bit more than just a clean, our workshop team can get it back to showroom condition.